
Creating a class list in a number design for the Design Lab
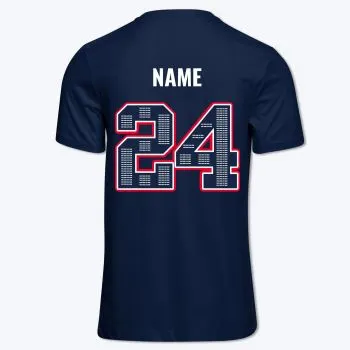
The following guide will take you through creating creating a custom group/class list in number designs. This guide requires the use of Adobe Illustrator. We suggest watching the video guide for the most comprehensive walk through.
Step 1: Prepare Your Class List
To start, compile a simple list of first name and last names for the class list. You can use which ever tool you find most useful for this. E.g. Excel, Notepad or TextEdit. Or download this CSV example used in our video walkthrough.
Please ensure this is thoroughly checked for spelling and that all names are in this list.
Step 2: Select and download a year in your desired font
Step 3: Set Up Your Template






Open the selected class list template in Adobe Illustrator
On the left side of the file, you will see a text column.
Copy the names from your class list here to assist with inserting all names into the design.
Scale the text box to view all the names
Step 4: Format the Text
Change the text to uppercase and align it to the center for a uniform look.
Remove any spaces between the first and last names (as required).
Please ensure that all names are correctly spelled and placed in the required order.
[Requirements for the font used within the number]
Step 5: Incorporate Names into the Design
Copy the formatted names into the text boxes within the number.
Adjust the size of the names using Illustrator's scaling tools and the text will flow through all the text boxes.
Utilize the leading tool to space out the numbers for a better fit within the design.
Decrease or increase the font size to fill out the number as needed.
Please note: This step may require some experimentation to achieve the perfect alignment.
Step 6: Customize Your Design
Feel free to group or ungroup columns for individual adjustments. Double-clicking into columns allows you to scale or adjust the leading for those specific areas.
Once satisfied with the fit, convert your text to outlines by using the shortcut Mac: Command + Shift + O. Windows: Ctrl + Shift + O
Access the layers panel (Windows > Layers) hide the locked background layer (located at the bottom of the layers tab)
Step 7: Export Your Design
Export your artwork by choosing "Save for Web" and select PNG format. Ensure you set the resolution to 300% for high-quality output.
Step 8: Upload to the Design Lab
Go to the design lab design and upload your newly created PNG file using the upload function.
Adjust the scale of the image to fit your design requirements. This is the perfect opportunity to add outlines, change colors, or experiment further with your design.
Congratulations! You've successfully completed your custom class list in a number template. Explore, experiment, and most importantly, enjoy the creative process.